Brother Printer Settings
1. Install labels into printer
- Unpack printer and plug into power.
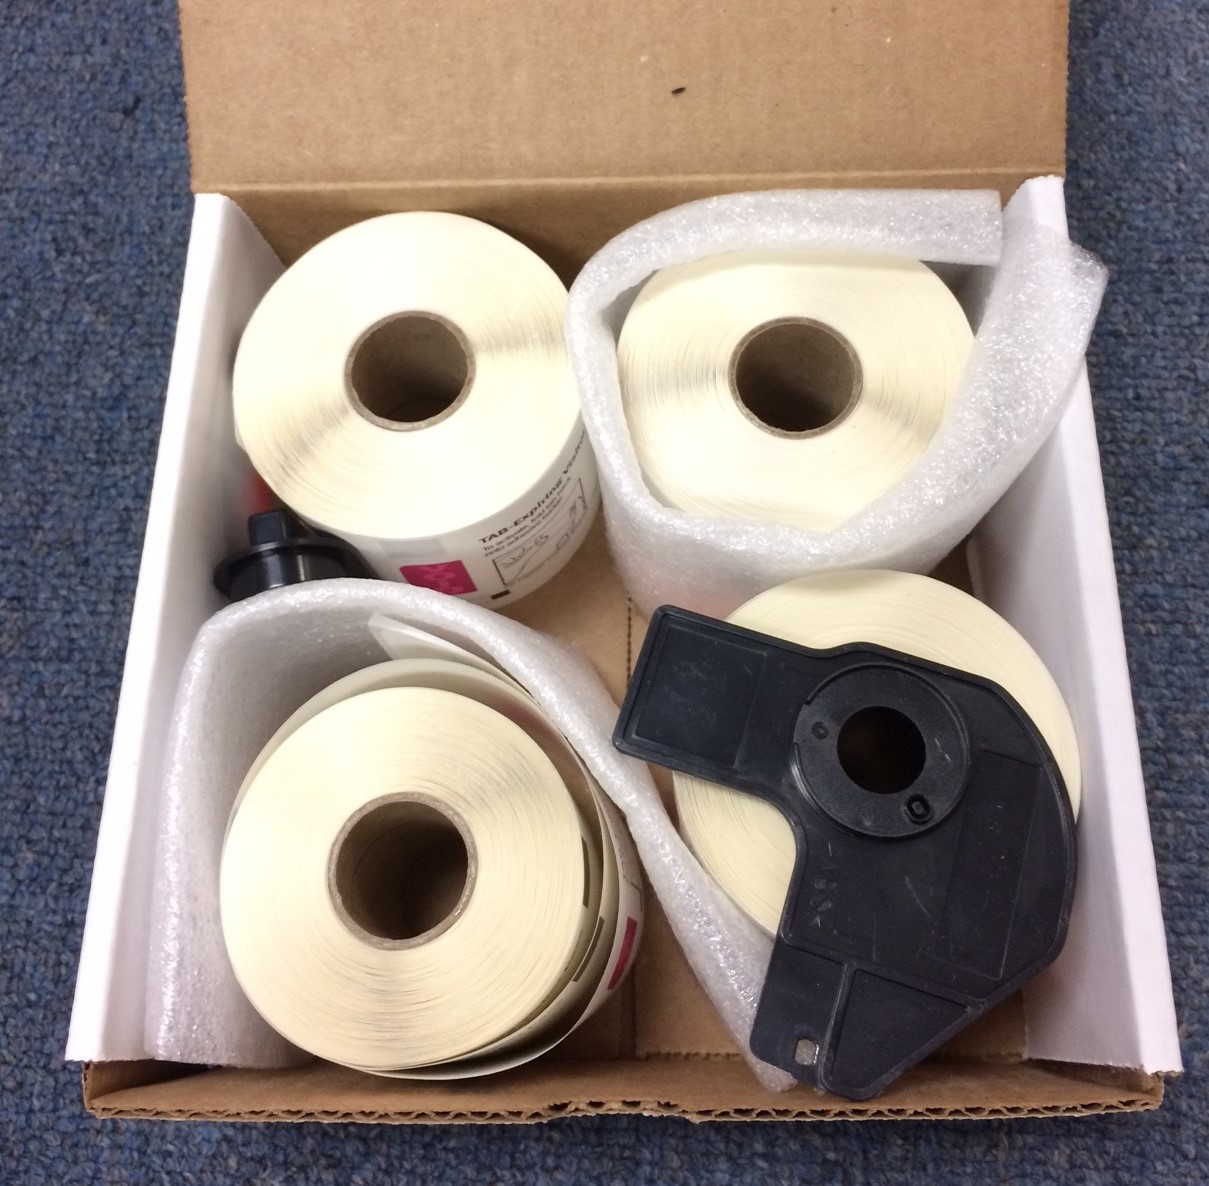
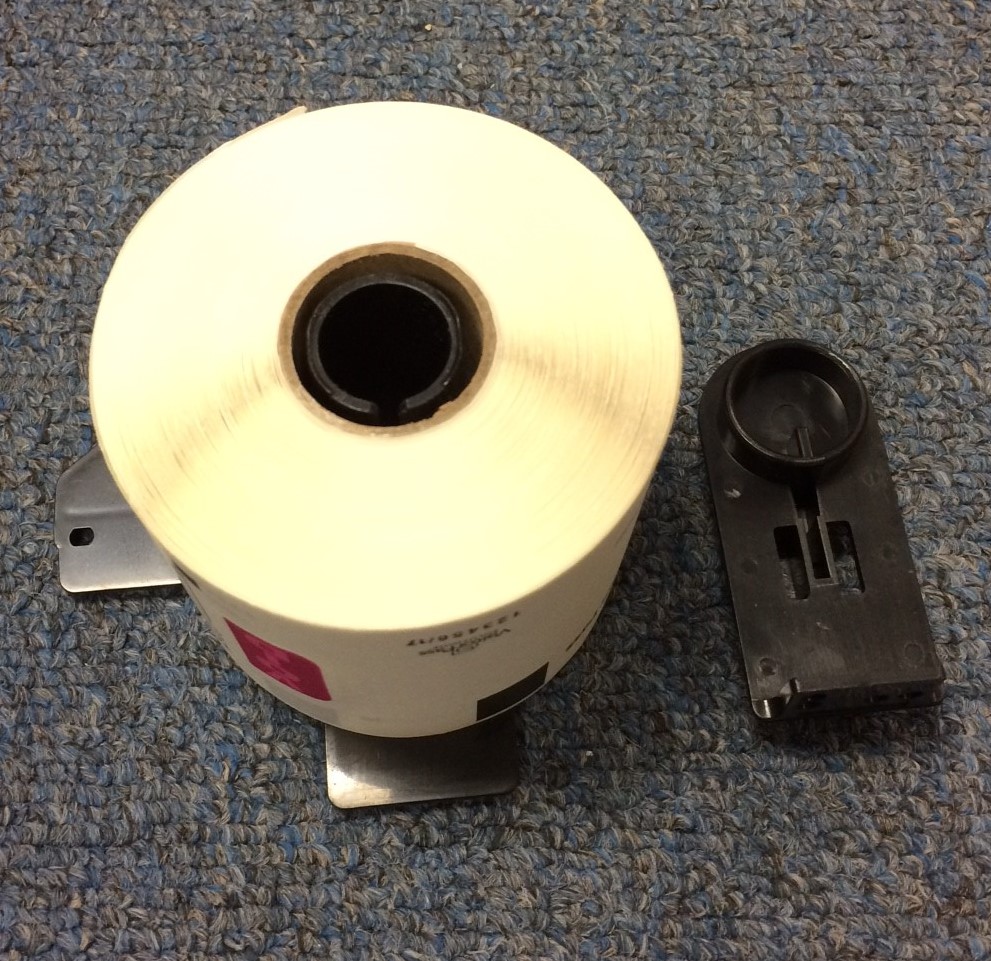
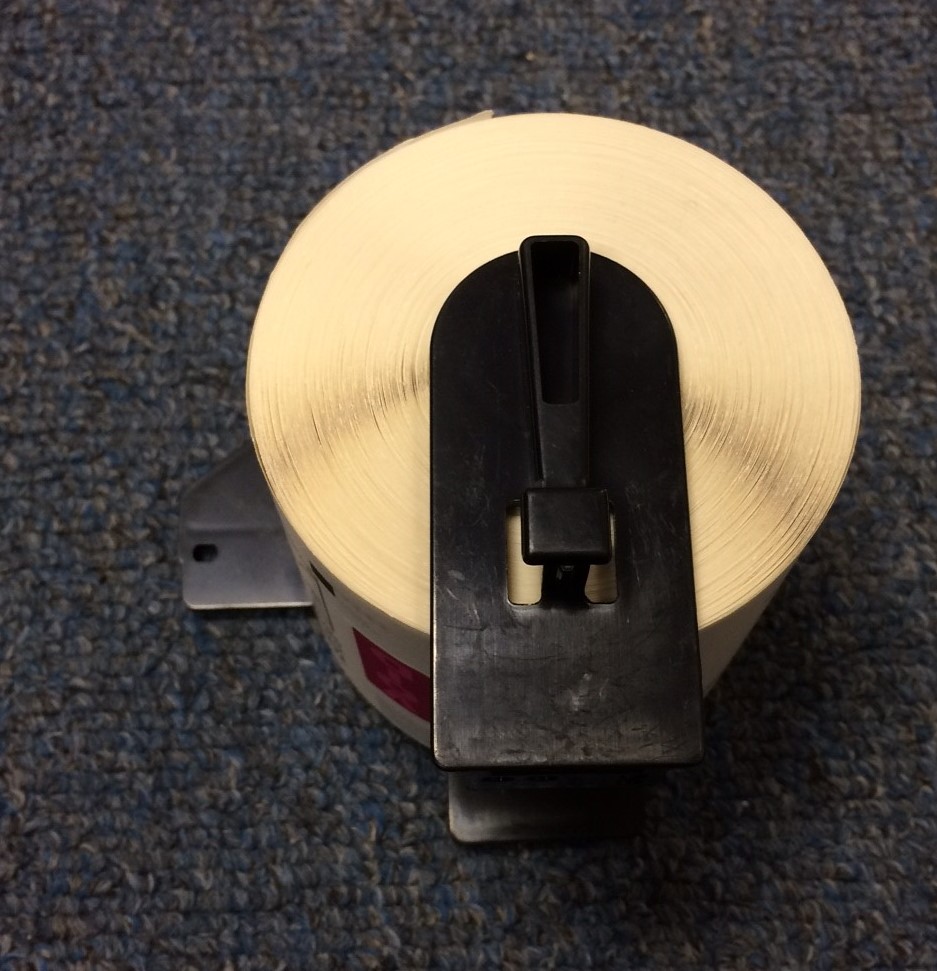
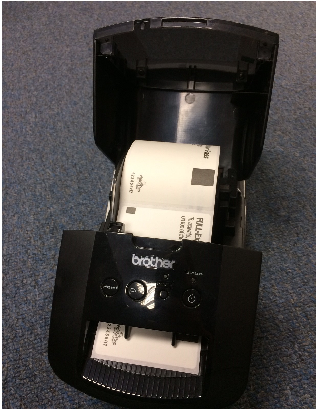
- Load labels into the reusable cassette as shown below (the cassette comes in two parts).
- Load the cassette and labels in the printer as normal. They go face down. Close the top.
- Press and hold "FEED" on printer to feed a single label. Then press "CUT".
- Note: if you cannot reliably feed a single label, eVisitor will probably not be able to print.
2. Configure Windows
- Plug the USB cord into the computer and load the driver. Note: sometimes you need a usb-2 port.
- OPTIONAL:
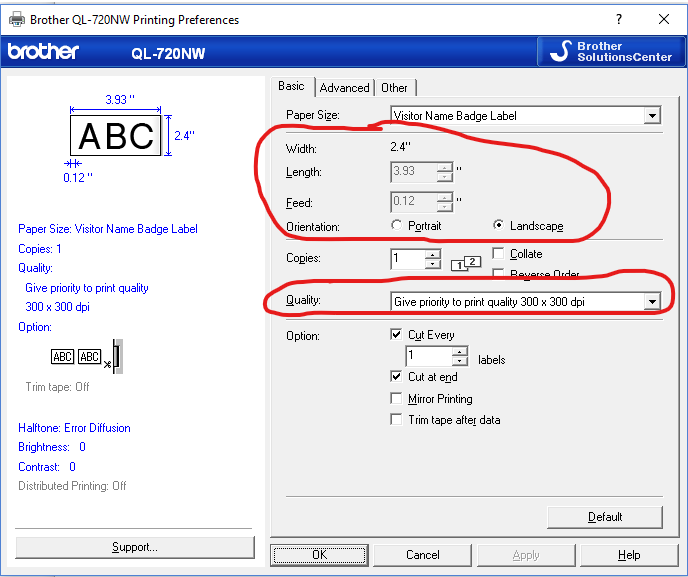
- Set paper size: Printing preferences, Page Size: "Shipping Label"
- Quality: "Give priority to quality 300 x 300 dpi"
- Print a windows test page.
- Note: If you can't reliably print a Windows test page, eVisitor will probably not be able to print.
3. Configure eVisitor
- Login to eVisitor.
- Goto settings, devices, label printer and select "Reset Printer Settings to default".
- Test by printing several badges.
If NOT using eVisitor
- Set paper size: Printing preferences, Page Size: "Shipping Label".
- Quality: "Give priority to quality 300 x 300 dpi"
- Test by printing several badges.
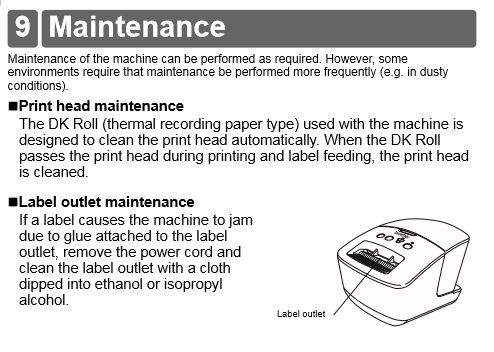
Maintenance information from the users manual
How to load labels into printer
1) Unbox labels
2) Attach the right side of the reusable cassette to the roll as shown (the cassette comes in two parts).
3) Insert into printer as shown below
Resources
QL-710W/720NW quick setup guide
QL-710W/720NW users guide
QL-710W Windows Driver
iPad printing:
Brother Network users guide
Brother Airprint guide
Copyright 2020 Data Management, Inc. All rights reserved.
1.800.243.1969