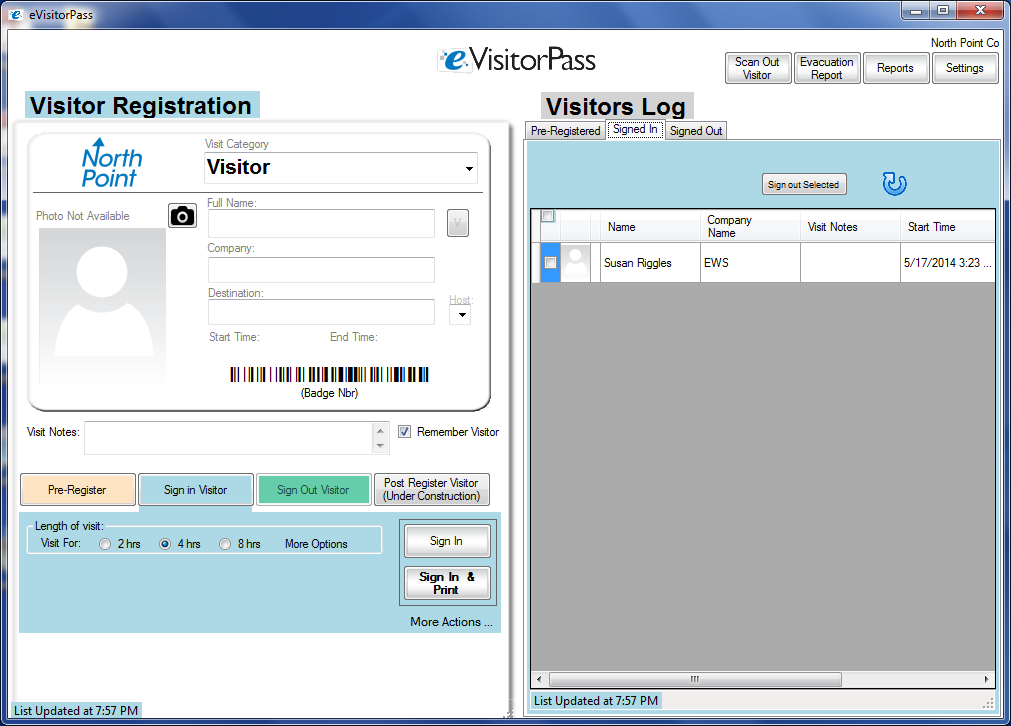
On the Visitor Registration panel
1. Accept the default Visitor Category or select a new one with the drop-down list.
2. Type in the Visitor's Name, or insert a driver's license into the optional eVisitorPass License Reader.
3. Optionally take a picture by clicking on the camera button. Follow the on-screen prompts to zoom in on the visitor's face.
4. Optionally type in the Visitor's Company.
5. Optionally type in the Host/Destination or pick from the drop-down list.
6. Click "Sign In and Print". The visitor will show in the "Signed In" list. A badge will print out.
- The Visitors information will be retained for future visits.
- The screen will clear for the next visitor.


Copyright 2014 Data Management, Inc. All rights reserved. | Terms of Use | About Visitor Pass Solutions | Contact Us | Made in the USA

1.800.243.1969